I recently taught my 5 year old son to play checkers. We have a game set that has a few different games in one nice wooden container. Unfortunately, the checker pieces that come with the set are pretty disappointing. They are small, don’t stack well for creating kings and overall boring. While teaching my son how to play all I could think is: We can do better than this. Enter 3d printing!
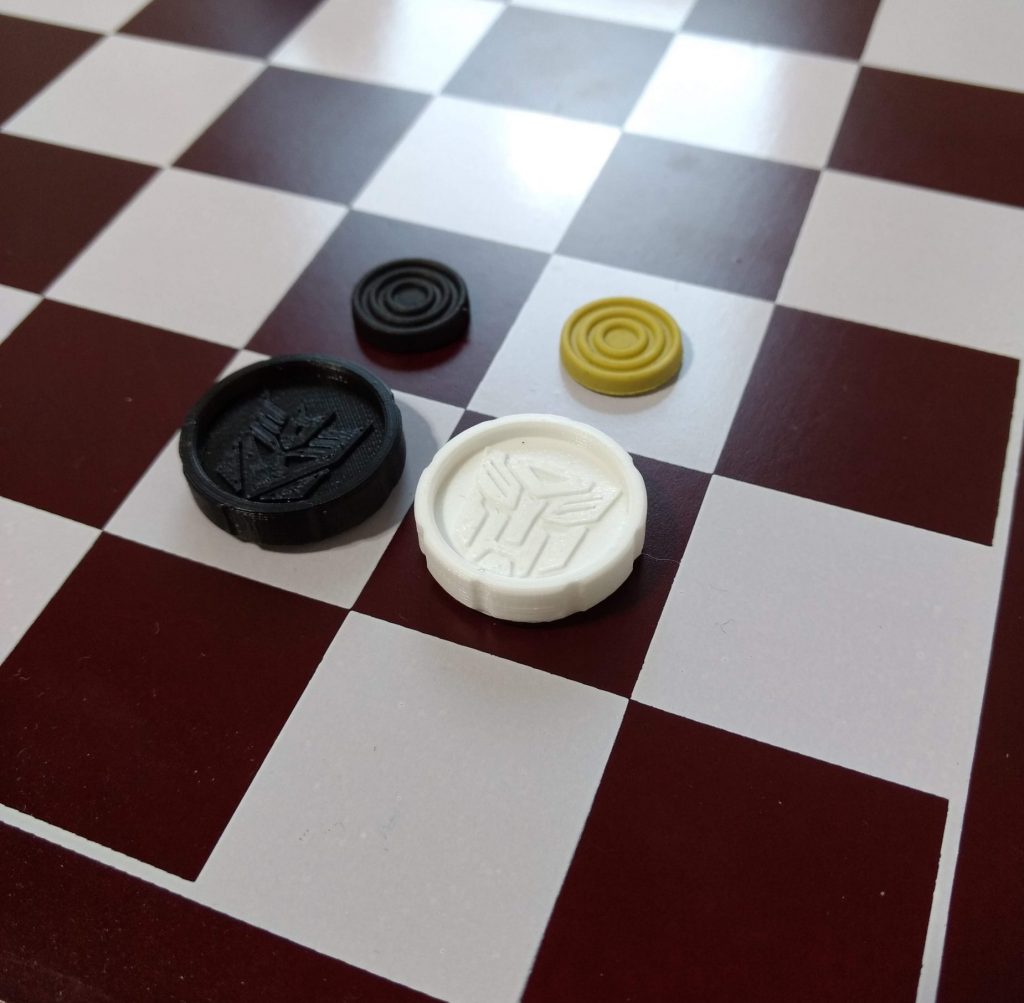
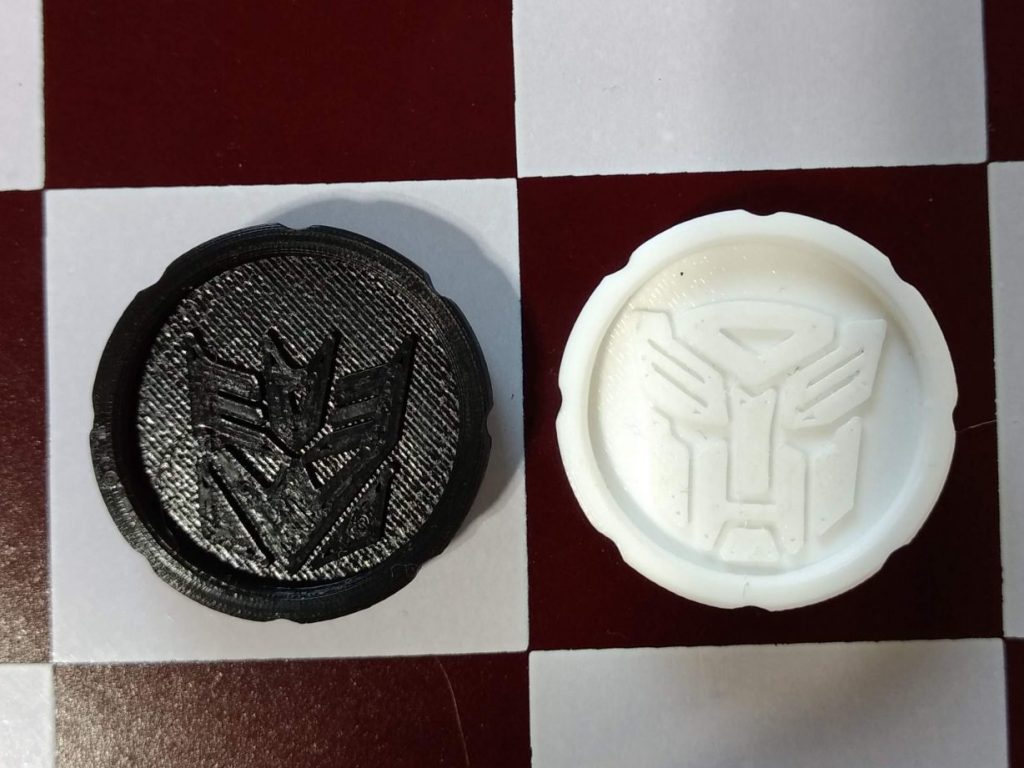
There are quite a few good vs evil characters for 5 year old boys to choose from, but we settled on Transformers vs. Decepticons. A quick search on Pintrest and I was able to find images for each character symbol. I know that I can use Fusion 360 to extrude an SVG image, so my next step was to use Inkscape to create one for each character.
You can pretty easily create an SVG from an image file such as a JPG or PNG using Inkscape. The first step is to import your image. Next use Path/Trace bitmap. The default settings in the Trace bitmap dialog box should be fine. Click ‘Update’ to get a preview of the trace. Click ‘OK’ to perform the trace and then ‘X’ to close the dialog box. Note that clicking ‘OK’ again will perform another trace.
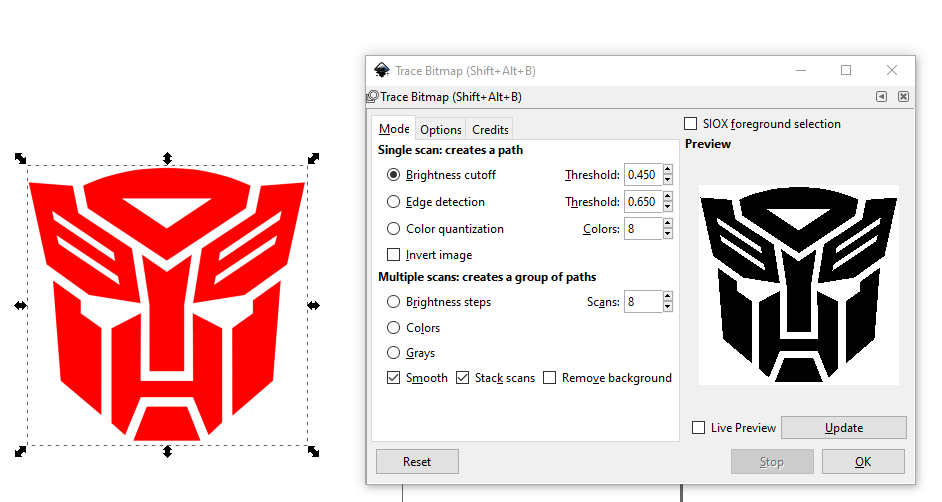
Now that the image has been traced, drag it off of the original image using click/hold/drag. Move it to the page area and resize it if necessary so that it all fits on the page. Make sure to hold Ctrl when resizing so that the aspect ratio of the image doesn’t change. Next, use File/Save to save as an SVG file (which is the default file type for Inkskape).
The final step was to create the design in Fusion 360 using the SVG file. First, create a new sketch. Then, use the Insert / SVG command as shown in the image below.
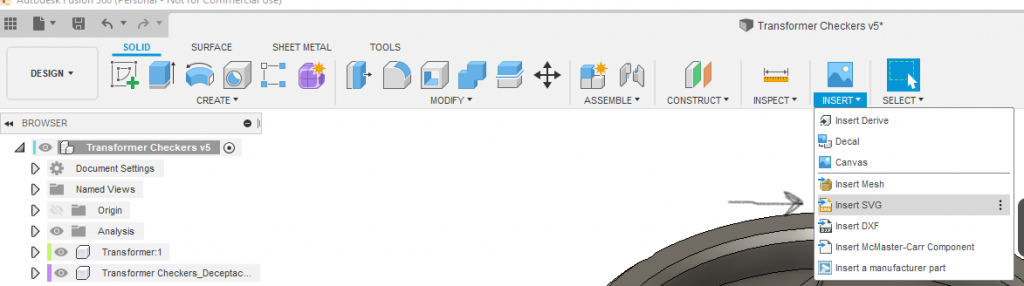
Once my SVG was inserted I had to manipulate it so that it fit on the checker piece. After it was positioned how I wanted it I used Extrude to create the graphic.
Below shows the playback of my design history in Fusion 360.
Our checker board is small, so these checkers are only 25mm in diameter. However, the original checkers that came in the game kit were 15.5mm in diameter, so it is still a big improvement. In order to give the new checkers a nice feel I printed them with 50% infill. I printed them in PLA. They can be printed at 0.20mm or 0.15mm layer height. They do need a little support under the bottom edge. This bottom edge is used for nesting with another piece when making a king.
I’ve posted STL files for this project on PrusaPrinters.org.